Ahh, Now I Know D.O.F! *Insert Creativity Here*
- gbdrcf05
- Mar 10, 2021
- 4 min read
Aloha friends and welcome (back) to my website! :)
Today's post is a continuation of yesterday's post covering different ways to capture different depth of fields... however, this post is specifically putting the three techniques to the test!
To start off, let's quickly review what depth of field is, exactly. To me, depth of field is basically a range in which the depth of anything is. Specifically relating to photography, depth of field is how the camera perceives and captures each portion of an image.
What we call a shallow depth of field will typically have only a portion of the photo focused, whereas the rest of the image is blurred. A really common example of this is within portraiture in which the person is the only thing in focus, and the rest of the image is blurred out.
What we call a deep depth of field will typically have everything or nearly everything in the photo in complete focus. A common example of this would be landscape photography!
Now that we've brushed up on our terminology, let's take a look at some examples of some photos I took showcasing a variety of depths of field!


D.O.F. Comparison Portraits


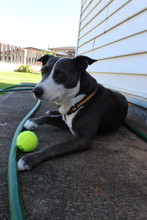
Shallow Portraits w/ Object in Foreground


Object Subject w/ Bokeh


Portraits w/ Bokeh


Comparison Strong vs. Weak Group Photos


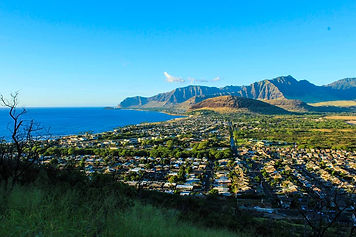
Focused Landscapes
Before breaking down some of these photos, I'd also like to touch up on the three techniques used to differentiate and create different depths of field: changes in physical distance, changes in digital zoom, and changes in aperture size. Three different ways to do the same thing! Changing your physical distance between the you + the camera and your subject, as well as the spacing of your subject and your background can create a shallow depth of depth photo. Zooming in on your camera, onto your subject can also help create a blurred background and/or foreground, which is also a shallow depth of field. And, the camera's aperture settings can determent the depth of field within a photo, so a smaller aperture like f/3.5 will create a shallow depth of field.
Because I am using a Canon Rebel t3i DSLR Camera with a Canon 18-55 mm lens, I am able to manually change my camera's aperture settings. However, if I were to be shooting with an iPhone, I would have to use the phone's camera modes: Landscape Mode + Portrait Mode.
But, now that we've refreshed our minds with this info, let's take a look at and take apart my top two, favorite photos!

In order to take this bokeh portrait of my emotional support rooster (I know what you're thinking, and I most definitely am not crazy. Yes, an emotional support rooster is a real thing!), I had to distance him far enough away from the tree background to get the any bokeh. Even though I used my camera's aperture settings as the main technique, I still had to have a change in distance in order to achieve the 'right' results. But, like always, after some testing out different techniques, positions, and camera settings, I was able to capture this image of my superior looking Rooster, MingMing. (There's a lot behind that name, don't judge too quickly)!
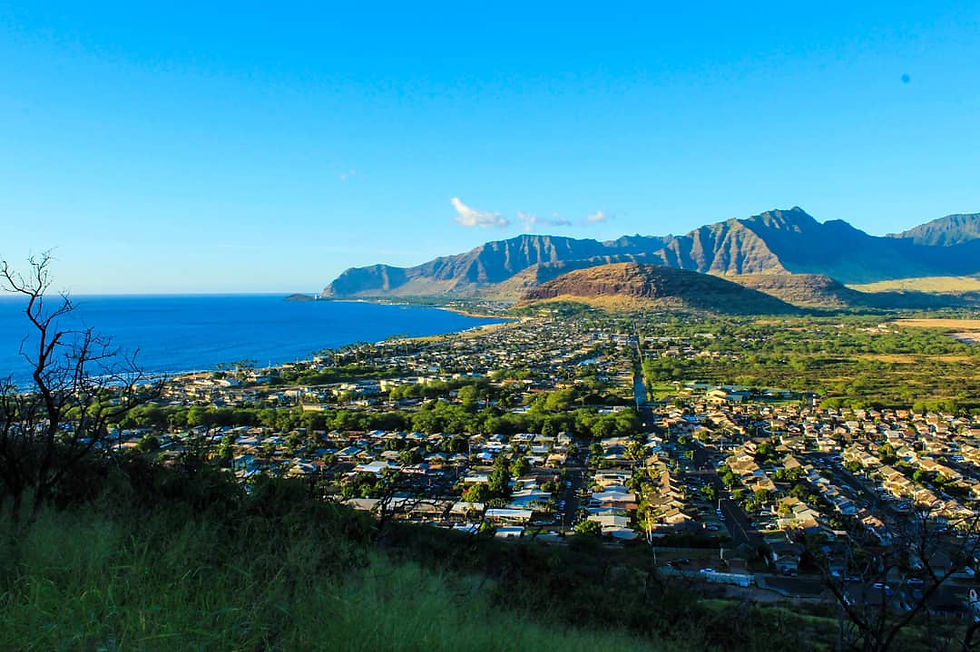
In order to take this landscape scene photo, I first had to climb up the side of a mountain! :D
No, but actually, I did. But other than that, to create this photo, I made my camera's aperture as large as it could be in order to create the deep depth of field I wanted. Because I was literally standing on the side of this mountain, - which, by the way, is the starting mountain of the Pu'u O Hulu Trail aka Pink Pillbox Hike, on O'ahu, Hawai'i - I couldn't alter my physical distance much. However, because I was trying to create a deep depth of field while still capturing everything I could see, physical distance changes and digital zoom weren't necessary!
After taking the time to focus on different depth of field techniques, and even just what depth of field is, I definitely feel more confident in utilizing each technique with wanting to create certain images with certain depths of field. I do feel that within some areas, such as with the technique of digitally zooming into the subject to create a shallow depth of field, I have improved and am, therefore, more proud of the results I received. I had worked with my camera's aperture settings before this time around, however, I do feel that my acquired knowledge about the other two main techniques will greatly help me in the near future, because now I know that I'm not only limited to my camera's settings.
Thank you for taking the time to read this post! If you like what you read/saw, please be sure to check out some of my other posts!
I am honored to be taking you along on my photography journey! I hope you stay safe and have a wonderful day. Much aloha!
For exclusive posts, behind the scenes, editing, photos fails, and more, follow my Instagram @giabellephoto or by clicking the Instagram icon at the bottom of this website! Mahalo!

Comments