Photograms :D
- gbdrcf05
- May 23, 2021
- 5 min read
Aloha friends and welcome (back) to my website! :)
This post will be me discussing and highlighting my most recent tangible photography experiences with photograms! : DDD
Firstly, what is a photogram?
Well, a photogram is very similar to a sun print. (If you don't know what a sun print is, feel free to check out the post that I made before this one). A photogram is also very similar to film negatives. When you make a photogram, you have a special piece of paper that's when exposed to light changes colors. For a sun print, the two colors were white and blue. For a photogram, the two colors are black and white and depending on exposure time, also grey.
One of the first things that you need to make sure is available to you when making a photogram is a dark room. Any excess light that hits the photogram paper will automatically expose the paper and therefore you will get messed up results. So it's very important to make sure that you are doing everything in a completely dark room, and if not completely dark then at least dark with dim, red lights.
Then, you also need to know how to work the enlarger. The enlarger is the light source for exposing your photogram. The enlarger has an aperture just like a camera does, and this aperture changes how hard or soft the lighting is, as well as how spread out it is. Also, there's a dial on the enlarger in which you can bring the light up or down which will also affect the area in which the light hits. You need to make sure that the light is hitting the correct amount of space that you wanted to before trying to develop your photogram.
Another thing to note is that with photogram paper, you will not see a result immediately after exposing the paper. And, instead of just washing it with water as we did for our sun prints, we actually need to use a variety of chemicals to develop the photogram. If you're familiar with developing film it's very similar to that and the chemicals are identical.
The first chemical that you use after exposing your photogram paper is called developer. This is what's going to bring out what was exposed versus what was not exposed. Soaking your photogram in this chemical for about 3-5 minutes will then allow you to see the results of your photogram.
Then, there's a chemical called Stop. This basically stops the development and contributes to the photogram paper staying the way it already is without adding onto its exposure. Leaving the photogram paper in this for about 30 seconds is enough.
Then you move on to the third and final chemical, Fix. This chemical will preserve everything that is on the paper. This means when the paper is exposed to light after you're done putting it through the chemicals, it won't change anything on the paper. It's sort of like locking it in place.
After about 3-5 minutes of letting the paper soak in the Fix, then you can rinse the paper with water for a few more minutes. And after that, all you have to do is let it dry and then you'll have your photogram.

One thing that is different about photograms compared to sun prints is that the length of exposure to light affects the results. In photograms, there's more depth and there are more tones available on the grayscale that will show up on the photogram paper depending on the amount of time it's exposed for, and depending on the transparency or opaqueness of an object. With sun prints, we discovered that the exposure time does not affect the result. Once the sun print paper is exposed to the Sun, then the paper will be that white color, and then once rinsed will be that deep blue color. It doesn't matter for how long it was exposed, it'll always change to end up being that deep blue color. That is where photograms are more detailed. Because again, exposure time matters, now.
For both of my final photograms, I decided to go for a monopoly theme. this is actually because on one of the days that I was creating layouts and brainstorming for my photogram oh, I had brought a bunch of board games and I thought might as well just try to make something out of the board game pieces. Before this, I had no plan for any objects for my photograms, so this worked out fine. And the game that I decided to go with was Monopoly. and, I actually like the way that the pieces for the most part showed up on the photogram paper. I was especially shocked by the way that the Monopoly money shows up on the photogram paper. I thought that it was really cool that you could see all the details in the Monopoly money on the photogram paper.
But anyway, most of my objects were 3D objects, except for the Monopoly money which was my 2D object, for my free choice anyway. Also, the majority of my objects, except for the Monopoly money, were all opaque. So, they all created clean-looking shapes.
For my free choice photogram specifically, I did have to expose one of the items for a different amount of time than the rest of the items on the paper. The cup in the corner is actually exposed for 3 seconds whereas the rest of the photogram is exposed for 5 seconds. And to do that, I had to cover the area of the cup to prevent light from shining through the cup onto the photogram paper and then wait for the timer on the enlarger to countdown to have 3 seconds left, and then I stopped covering the cup. Something important to note here too is that I couldn't just block the light and hold my hand still there, I had to be kind of moving around so that the shadow of my hand or the shadow of the cardboard blocking the light wouldn't leave something on my photogram paper. I've heard that this is called dodging and burning.
For the composition and design of each of my prints, I had to worry about the arrangement of the objects. I think the arrangement of the objects was what took me the longest. But once I was able to figure that out everything else was relatively easy.
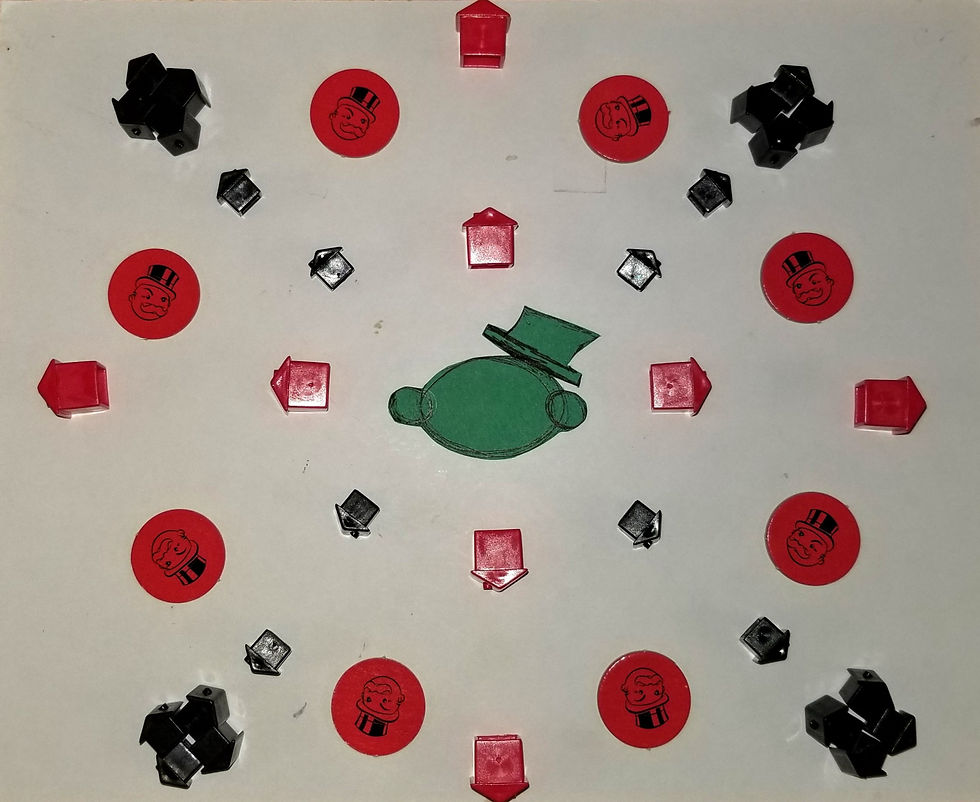
For my mandala photogram, I had assembled some of the smaller Monopoly house pieces into circles using four of those smaller house pieces and put them on the outer edges of the circle as you can see in the picture.
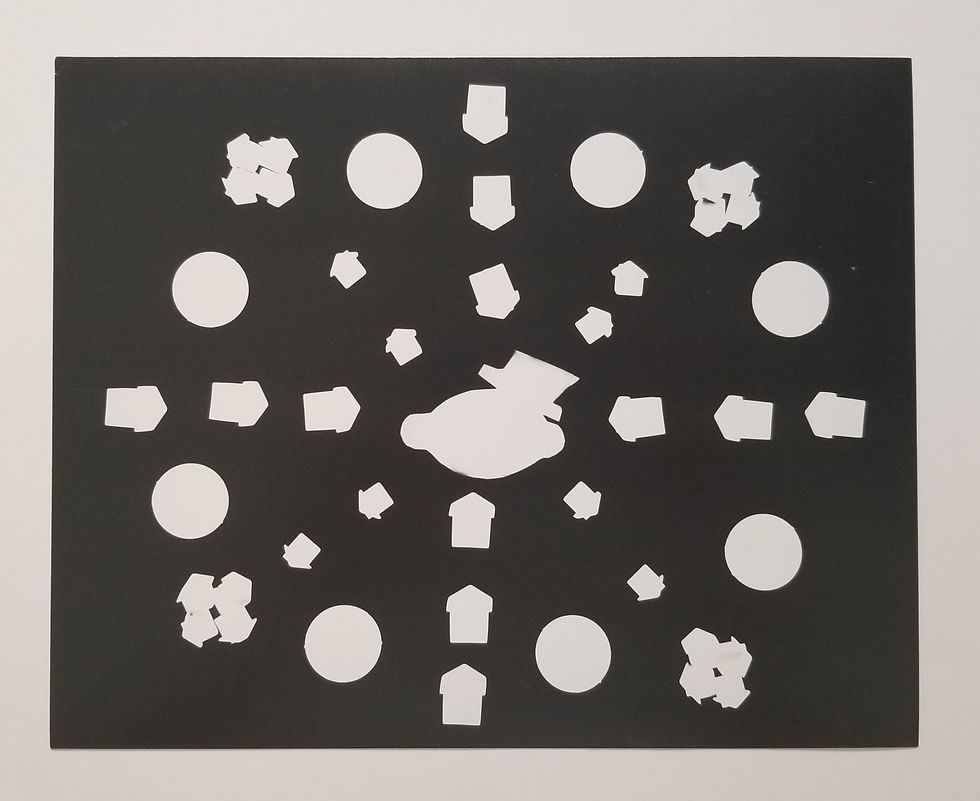
For my free choice, there wasn't really any altering of my objects. However, there was a lot of thought put into the arrangement of the objects and the spacing of the objects to make it look relatively balanced but also still like it was an accident.

Compared to the sun print, the darkroom photogram experience I feel was better than the sun print experience. However, I do feel that the sun print work allowed me to prepare for the photogram assignment.
There are two things that I like about the photograms over the sun prints, though: 1 is how detailed the photogram paper is once exposed, and 2 is how the exposure time does affect the final product. Both of those things don't exist when it comes to sun prints, but within the photograms it does. I did dislike that the sun prints didn't have that much detail and that exposure time wasn't relevant, which is why I prefer the photograms over the sun prints.
Thank you for taking the time to read this post! If you like what you read/saw, please be sure to check out some of my other posts!
I am honored to be taking you along on my photography journey! I hope you stay safe and have a wonderful day. Much aloha!
For exclusive posts, behind the scenes, editing, photos fails, and more, follow my Instagram @giabellephoto or by clicking the Instagram icon at the bottom of this website! Mahalo!

Comments